Assuming you have fixed, processed and embedded your tissue correctly, the next stage in the life of a paraffin block is to cut good sections.
As anyone who has used a microtome will attest, this isn’t always the easiest thing in the world to do. When sections cut well, it can be an absolute joy (yes, there are many other things in this world which are joyous, but this is coming from the viewpoint of a self-confessed nerdy scientist!) When you’re having one of those days when it seems impossible to even cut a short ribbon of paraffin embedded tissue, well, time just seems to drag like a blunt blade through over-fixed tissue!
Unless you are very lucky, almost all of us will encounter problems when trying to cut good consistent sections. My advice for anyone starting out would be to get taught by someone who is experienced and skilful in using a microtome. Additionally- read on and I will share some tips I have learnt over the years. As the previous articles have highlighted the process of tissue which has been paraformaldehyde fixed and paraffin embedded, then I will look at cutting sections from such a block. Alternative fixation and embedding are available and may be covered in future articles.
If you are using a microtome in a shared then it should already be in an ideal position within the lab. What is an ideal position for a microtome? Well, preferably in a corner/side room which doesn’t have lots of people passing by. There should also be no down drafts from air conditioning units or fans. The slightest movement of air around a microtome will change you beautifully cut ribbon of sections into a tiny wax kite! There should also be an adjustable and movable chair as sectioning is often time consuming and for ergonomic reasons, you need to be as comfortable as possible. One or more angle poise lights are also highly recommended.
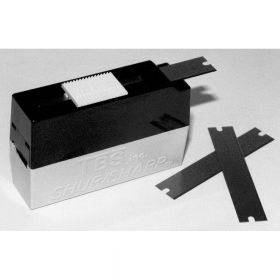
A word about safety- obviously, microtome blades are large and extremely sharp. If you drop one, on no account should you try to catch it. I also recommend handling the blades with forceps only (most have horizontal notches which makes it easier to pick up). Disposable blades come in a plastic box with a double slide (such as these ones http://www.agarscientific.com/lm/sectioning/microtome-blades-disposable.html ). It’s a good idea to slide the blade directly into a dish of xylene or Histoclear which will remove the protective oils used in the manufacturing process. Have the dish next to the microtome as you certainly don’t want to be wandering around a shared laboratory brandishing a large sharp blade. I would always suggest starting each session with a new blade, especially with a microtome which is shared with other users. Never assume the blade left in the microtome is sharp or clean for that matter. After five minutes in xylene/Histoclear, remove the blade using forceps and place in the blade holder of the microtome. Always start cutting with one end of the blade and systematically move the blade along as your cutting session continues, or when you notice any vertical lines in the ribbon you are cutting or if small pieces of wax get caught in the blade. Continuing the safety theme- microtomes usually have a lock, a brake and a blade guard- use them! The blade guard flips over the blade holder when not in use and when you are changing blocks. Always use this- your fingers are directly above the blade when clamping blocks and the blade can be obscured from view when doing so. In addition, when changing blocks, use the handwheel lock- this will lock the clamp head at the top of the cutting stroke (in a 12 o’clock postion). When you are finished using the microtome, you should always leave the cutting wheel in the locked position. Finally, the microtome should also have a brake which will lock the cutting wheel in any position. This is used when adjusting the section thickness of the microtome, or moving the blade along.
Before cutting your blocks- there are two things you need to do, trimming and cooling. When the block comes out of the wax mould, you’ll be left with more wax than you actually need or want. In the histology lab where I used to cut my sections, we had some old (not too sharp!) cut throat razors- we used these to trim off the excess wax from around the blocks. Place the blocks on a flat surface and carefully trim off the wax on all four sides at approximately 45 degrees around the tissue. Don’t be tempted to trim off too much though- remember, the wax is there to support the tissue during the process of sectioning. Conversely, you don’t want to end up with sections which are larger than the width of the slides you will be collecting them on. Once you’ve trimmed the blocks, you need to cool them. The colder they are, the easier they are to section. However, don’t be tempted to place the blocks in the lab freezer, this will only lead to cracks on the surface and the tissue may come away from the surrounding wax. Ideally, place the blocks on a thin sheet of aluminium which is sitting on an ice tray. Not only does the ice cool the wax, but a small amount of water will penetrate the tissue which again helps in cutting good sections (especially if the tissue is dehydrated to some extent).
Place the blocks in the clamp of the microtome once they are cool (and with all of the above safety features in place). You now want to cut into the blocks to a depth where you will acquire the desired amount of tissue section needed for your histology/immunohistochemistry. Most sections are cut to a thickness of around 5 mm. There should be a small lever on the microtome which, when pushed down, will double the cutting depth without the need for changing the thickness setting (or this may be set to a default of 30 mm- check before you start). At this stage, be aware than rapid, thick sections may damage the tissue, so best to err on the side of caution! Once you have reached a desired representative section of tissue, release the lever and cut a few sections at the thickness required.
You are now ready to cut and collect your sections. Using the microtome handle, try to cut in a slow and consistent manner- don’t start and stop whilst the blade is cutting a block as you will only end up with horizontal lines across the block and your sections (and very slight changes in thickness). If you are new to cutting blocks- ask if you can have a practice block. Alternatively, fix and process some control tissue at the beginning and use this until you get the feel for cutting consistent sections.
Finally (for this article)- paintbrushes! If you are using a shared histology lab, you should see some small paintbrushes lying around for you to use. These aren’t there for a spot of decoration or artistic expression whilst you wait for blocks to cool! Using a small paintbrush (or two), is the best way to handle sections you have cut. Don’t be tempted to use your fingers- you only risk getting them close to the blade, plus the heat of your hands will melt the supporting paraffin wax. Some people use forceps for handling sections, but I always found these a bit too rough and they are more likely to rip or stick to sections. Instead, roll the paintbrush under the ribbon of sections as you cut them. Once you have the desired length of ribbon, roll the paintbrush up and under the ribbon and carefully lift away from the blade (taking care not to touch the blade). Transfer the ribbon to a floating out slide- these are large (around 6 or 7 cm square) glass slides used to transfer the ribbon from the microtome to the floating out bath.
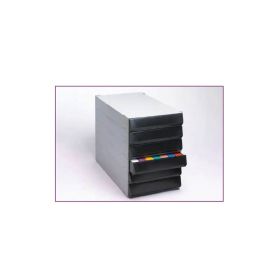
Once you have finished cutting your block, put the safety features of the microtome in place and transfer the block to a slide storage unit such as this http://www.agarscientific.com/lm/slide-block-storage/filing-cabinet-for-cassettes.html . Store the blocks somewhere cool and dark.
I’ll take a look at floating out, slide drying and slide choice in the next article.
Author: Martin Wilson


